How to Auto Import Classes in Android Studio
Android Studio is the go-to tool for developers to create Android applications. While writing code in this IDE for Android, we make use of several built-in classes. To be able to create instances of such classes, we have to add the import statement on top of the java file. We can do it manually or we can use shortcuts to import the necessary classes. We can also configure Android Studio to auto-import the classes as we use them.
For example: To use the TextView class, we have to add the line: import android.widget.TextView on top of the .java file we are working with. We can manually type it out or we can hit Alt + Enter while placing our cursor on the TextView keyword and select import class. It still takes some work to navigate to the line and use the shortcode. A better way to do it is to use the auto-import feature.
To auto-import classes in Android Studio, follow these steps:
- Go to File > Settings [Ctrl + Alt + S].
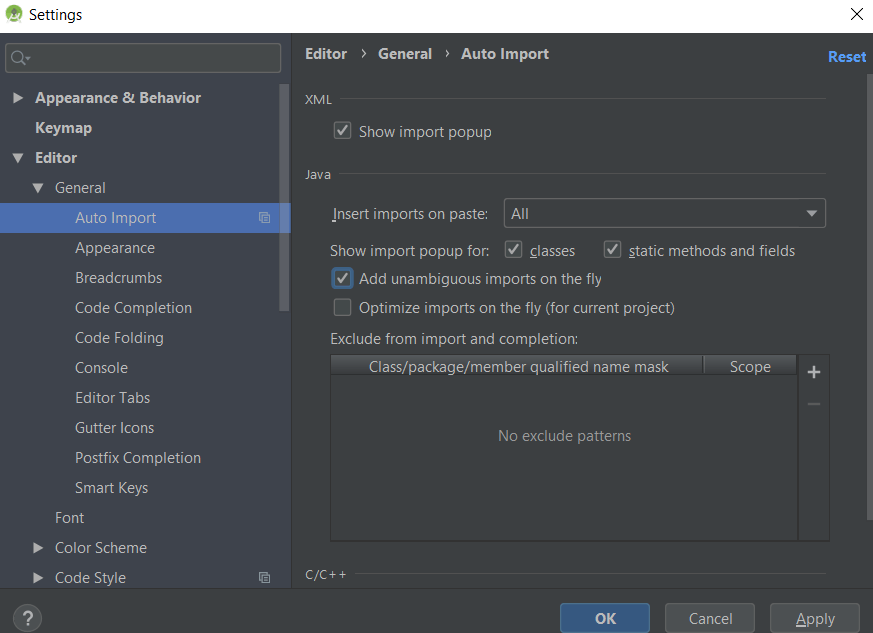
- Navigate to the Editor > General > Auto Import sub-setting.
- Under Java, Insert imports on paste, choose All from the dropdown.
- Check the option that says, ☑ Add unambiguous imports on the fly.
- Hit Apply or OK to save the changes.

Additional Tip: Check the Optimize imports on the fly (for current project) to remove unused import statements.
You can refer to the screenshot above for the correct setting. Now, as you use the system classes, they will be automatically imported by Android Studio. No need to spend some time to add the correct import statement.


