How to Reboot a Google Nexus Device in Recovery Mode
Recovery mode is a useful feature in Android devices that you can use to fix problems with the OS or apps. You can use it to wipe cache partition, manually apply system updates from different sources and even wipe the phone or factory reset it. This is a tutorial that gives you the detailed instructions to reboot a Google Nexus device into recovery mode. The steps have been tried using the famed Nexus 6P phone by Google and Huawei.
Here are the steps to reboot your Google Nexus phone in recovery mode:
- Turn off your phone by pressing the power key for a while and tapping on Power Off.
- After the phone is off, press the physical volume down button + power button together to start the phone.

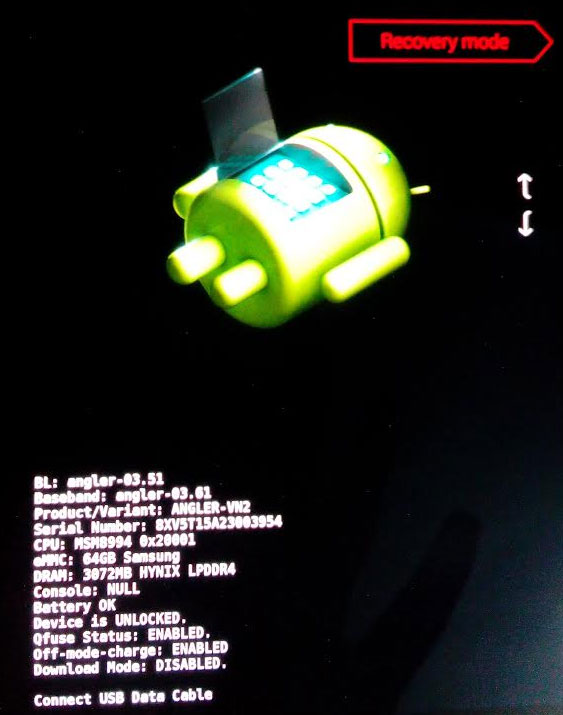
The phone will start into bootloader. You will see a black screen with the Android mascot lying down and its hood open. You will also see some text on the bottom. The touch screen is not usable. - Use the volume up and down key to cycle through the options. Highlight the option that says Recovery mode.
- Press the power button to enter.
You will again come across a smaller version of the Android mascot lying on its back. You will see an error sign and the text under it will read No command. - Press the power button, hold it and then press the volume up button.

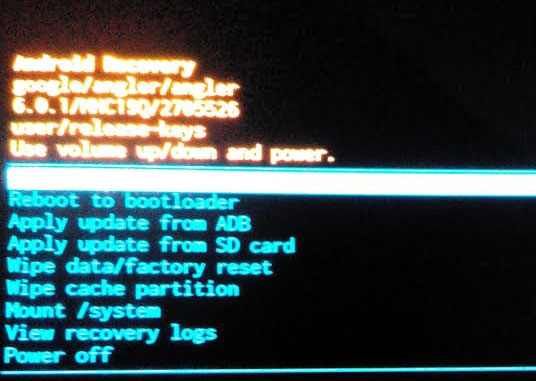
Congratulations, you have successfully started your Nexus device in recovery mode. The several options that you will see are:
- Reboot system now
- Reboot to bootloader
- Apply update from ADB
- Apply update from SD card
- Wipe data/factory reset
- Wipe cache partition
- Mount /system
- View recovery logs
- Power off
Now, you can use the volume buttons to navigate through the options and press the power button to execute a command.

