Fix Can’t Connect to Camera Error in Android
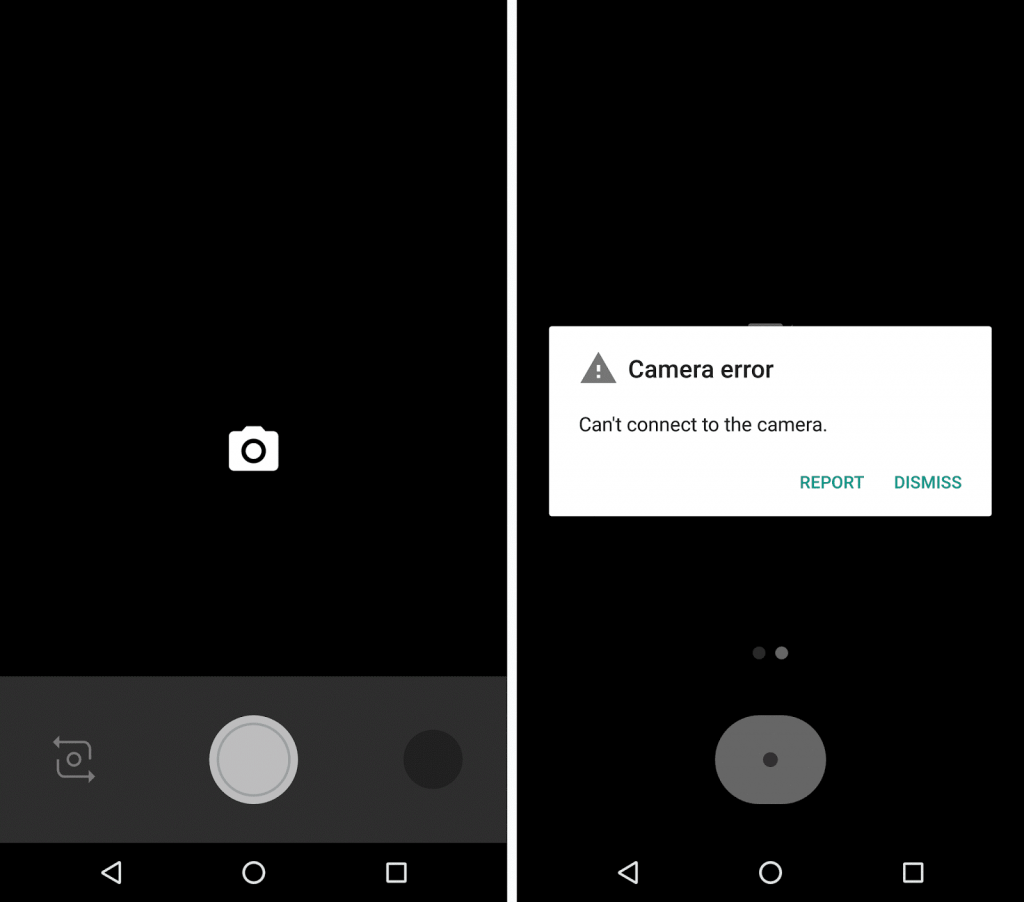
The “Can’t connect to camera” error message is displayed when there is a problem trying to access the camera of your Android powered smartphone or tablet. More and more users are reporting this can’t connect to camera error. It isn’t easy to point out the source of the problem. It may be a software issue or the problem might be in the hardware. So, there isn’t a single solution for the issue.
Beginning with the problem at hand: When you try to access the Android camera, you get a blank screen with the camera icon in the center. After a while you get the error message.

I used to face this problem in my Nexus 6P sometimes but the frequency of it increased and now I can only use the camera once after restart. After I exit or navigate away from the camera app and then try to take some more photos, it doesn’t work. Some people complain that they get the error when they try to record slow motion 240p videos in their Nexus phone.
Here are the different things that you can try to fix the “Can’t connect to camera” error in your Android phone:
1. Basic Level Fixes
A) Simplest Fix: Restart
Users have reported that their camera works after a restart. For some, a number of restarts results in the camera working. So, the first thing you need to do when anything breaks is: To turn it off and on again.
B) Restart in Safe Mode
Android has a “Safe Mode” feature, meaning you restart the phone and turn it on while making only the basic apps and features available. It is great for troubleshooting as downloaded apps are disabled and you will be able to determine whether there actually is a conflict between the various third party and system apps that have permissions to use the camera.
To restart in safe mode:
- Hold the power button until the shutdown menu is displayed.
- Tap and hold the Power off option for a few seconds.
- Confirm that you want to Reboot to safe mode.
When you start in Safe mode, access the system camera app. Take a few pictures if it allows you to and then exit the app. Access it again and see if it still works. If indeed the camera app works in safe mode, then you have narrowed down the cause to a conflicting third party app that isn’t allowing other applications to access the camera.
The next thing to do is:
C) Remove Conflicting Third Party Apps
Try removing applications for which you have granted the access to camera. These are the applications that can take pictures. For example: Snapchat, Whatsapp etc. using which you can take photos directly from within the app and share it. Uninstall such applications one by one and try accessing your system camera app.
If the error message can’t connect to camera seems to go away and you can use the camera easily, then the problem is gone. Don’t forget to switch between video, panorama, and other modes while testing.
D) Try Third Party Camera Applications
If your camera app is the only one that gives you the accessibility error, then you can also give other third party camera applications a try. There are tons of those out there in the Play Store. Open the application market and search for “Camera”. Try the popular applications like: (1) Candy Camera, (2) Open Camera, (3) Camera 360, (4) Camera MX and (5) Camera for Android.
If those work then you have narrowed down the problem to your official camera application. Go to your Android Settings > Apps and find Camera. Uninstall updates for it (if there is an option to do so), clear the cache and data, force stop the application, re-install updates and give it another try. If you do not know where these options are, then follow the steps under the next heading.
2. Moderate Level Fixes
These are the common steps that we follow when an app is showing an error. Do all these and force stop the app, swipe it away from the recent app list or restart the app before trying again. These steps remove information stored by the app. They won’t remove your saved photos.
A) Wiping App Cache and Wipe Data
- Visit Android Settings.
- Click on Apps (usually under devices)
- Find the Camera app and tap on it.
- Tap on Clear Cache and Clear Data and confirm your action.
- Restart the phone or force stop and disable enable camera before giving it another try.
B) Removing and Re-installing Updates
Visit the same app settings as shown in the steps above and if it shows the option to uninstall updates, then do it. But remember that you should not use old versions of applications, so visit the Play Store to upgrade it once again.
C) Check the Permissions (Android Marshmallow)
Android Marshmallow has a granular app based permission system. You need to confirm that your camera application is given the permission to access the camera. Normally, if it doesn’t have the necessary permissions then it asks for them during launch.
- Visit the app settings and tap on Camera.
- Tap on Permissions.
- Confirm that the camera permission slider in towards the right. You can turn it off and on again.
3. Advanced Level Fixes
These fixes will wipe your entire Android phone. So, be sure to back up everything. Save your photos, your account information and backup applications in your Google account. Those will be re-installed once you add the same Google account to your device.
A) Wipe Cache Partition
This recovery option is for clearing temporary system data that may clutter things and get outdated as well. It also clears all the leftover files from your system upgrade. This option is available in the Recovery mode which is accessible once you restart the phone to the bootloader.
To wipe the cache partition:
- Power off the device.
- Hold the volume down + power button to start the phone.
You will see the Android robot under maintenance.
- Use the volume button to navigate to Recovery mode.
- Press the power button to enter.
- Press and hold the power button and then press volume up button.
- Find the option that says wipe cache partition using volume buttons and press the power button to perform the action.
After it is successful, reboot your phone and try the camera app again. Please note that in your device it may be some other combination to access the maintenance and recovery mode.
B) Factory Reset
Factory reset is your last resort but if nothing else works, you have to do it. It wipes everything from your phone and you will get a clean device requiring the new phone setup wizard to be completed. So, backing up is absolutely required.
Here are two methods to factory reset your phone:
Method I: From the Recovery Menu
- Turn off your Android phone.
- Press the volume down along with the power button to start your phone.
You will see the Android mascot on its back.
- Navigate to the option that says Factory or Factory Reset and use the power button to confirm.
Method II: From the System Settings
- Navigate to Android Settings.
- Under Personal go to Backup & reset.
- Tap on Factory data reset.
- Confirm your action.
If all these methods do not work then the problem might be in the hardware. You can send the phone back to your seller if you are still under the warranty period. Otherwise, choose a trusted hardware repair shop and they might be able to fix it. If you are still not sure that it is a hardware problem, then you can wait for a system update which might be on the way.

