Downloading and Using BlueStacks App Player for Windows
With millions of users and downloads, BlueStacks is one of the most popular Android emulators that is out there. Known officially as BlueStacks App Player, it was one of the first desktop apps that could emulate Android in Windows machines. While the app player has gone through some significant changes since its introduction, it still is good enough to use Android applications right in your desktop or laptop computer.
Downloading BlueStacks
BlueStacks is available for free and you can get it from its official website: www.bluestacks.com or you can click here to go to the download page directly. Once you visit the page, it will prepare and download the offline installer for you. The size is moderate (250+ MB). After downloading the BlueStacks2_native.exe file, open it up and complete the installation process. It is fairly simple where you hit next and accept their terms and what not.
Running and Using BlueStacks
Just find a shortcut to run BlueStacks from your start menu on Windows or from the desktop. It takes a few moments to load up but once it opens, you will get access to its glorious features. You can control it using your mouse and keyboard, and it is quite convenient as well.
Home Screen
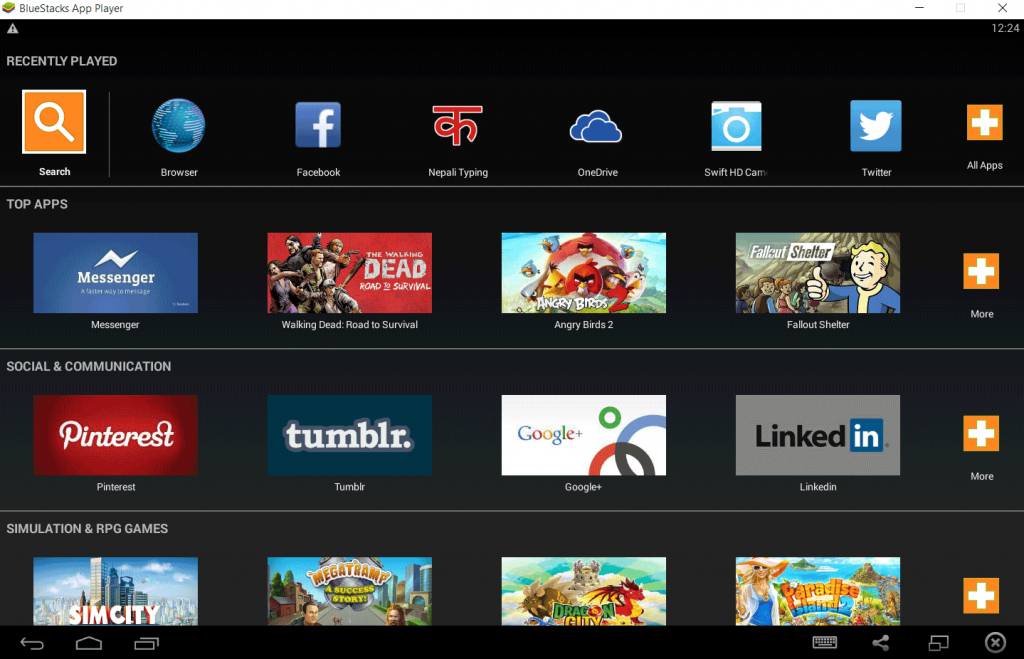
The Home Screen has been modified to offer a completely different functionality. If you have been using Android tablets or phones only and if you happen to access the BlueStacks home screen (or desktop if you call it that), you might find it quite different. It is in some way similar to the tablet layouts.

The first thing that you notice is that the home screen is filled with apps—well actually links to install apps. They are Android applications which the software seems to promote to its users. You can scroll through the rows and rows of Android apps and games which you might be interested it (but typically not). They are sorted into categories and you might find few ones that you happen to use on your mobile phone and now want to use it in your personal computer.
On the home screen, you will also find the usual Android perks like the notification bar and a bar that contains the standard Android buttons like back, home and switch. There are also buttons on the bottom right section to bring out the on screen keyboard, a share button, full screen button and an exit button.
Installing Apps
Even though the apps are listed for you to install on the fly, you need to know that you have to authorize the Google Play Store or the alternative 1Mobile Market (which seems to be offline). For enabling the Google Play Store, you need to sign in using a Google ID. Once you’ve signed in and enabled AppStore and App Sync, you can download your favorite ones from the Play Store.
After the setup, to install any app:
- Hit the search button.
- Type the name of your favorite app or any keyword(s).
- Hit the Search Play for <app name> button.
You will be redirected to the familiar layout of Google Play Store. Navigate around it and install the Android applications of your choice.
Accessing Your Installed Apps
Go to the home screen and on the top row, you will find your installed applications. Click on the Plus (+) button with the label All Apps and it will take you to a screen where only installed apps are there. Click on any one of them and enjoy their features. You can use anything from Facebook to Twitter, WhatsApp to Viber, Clash of Clans to Pocket Mortys in BlueStacks.
Also, note that hitting the close button or the ‘X’ button will just minimize it to the Window’s taskbar. You can right click on it to exit completely or you can use other right click menu options like checking for updates, restarting etc.

