How to Record Your Android Screen using adb in KitKat 4.4
Since Android KitKat 4.4, a new adb command called screenrecord can be used from the command line to record screen activity as a video. Instead of just taking picture screenshots, you can easily take video screenshots in your Android phone. This allows you to create videos of applications being used or games being played in your Android device. After recording, you can easily share this video with anyone. To record videos, you will be using the command line tool called adb (Android Debug Bridge).
This command is meant for developers who want to provide videos of their apps being used. But normal users can also use it to record their screen activity. However, to be able to use this tool requires some technical capabilities. You will have to download, install and setup some programs in your PC and config some simple settings in your phone.
Before You Begin
There are certain requirements before you can begin recording videos in your Android device. They are:
Android Device with KitKat 4.4 (Api Level 9): You should have Android 4.4 installed device for this feature to work.
Android System Development Kit: A tool from the Android team that developers use to develop and test Android apps. This tool is a one click download available for free from the official website.
Java Development Kit and Java Runtime Environment (Bundled as Java SE in Oracle’s website): This Java related system development kit is required for Android System Development Kit. These can be downloaded from Oracle’s website for free. Installation is required.
Add adb to command prompt: This is required to run adb command in command line prompt from any location. This process is different for personal computer with different operating systems. We have a tutorial for adding adb to command prompt in Windows 7.
If you don’t want to add adb to command prompt
- Open command prompt and navigate to Android Developer Tools Bundle folder.
- Then change your directory to sdkplatform-tools. It is because adb.exe file is located there and you will be able to execute adb command when you are inside that folder in command prompt.
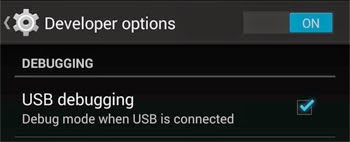
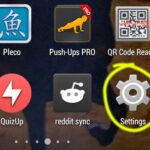
Enable Android Developer Options and USB Debugging: You will have to turn on Android Developer Options as well as USB debugging. Only then, will you be allowed to run adb commands to record videos.
Note: After it is turned on, you can find “USB Debugging” option which you can check to turn it on as well.

Connect your phone to your PC: Make sure to connect as a Camera (PTP) device. When your phone asks to “Allow USB debugging?” click on “OK”.
After Everything is Prepared
Make sure that you’ve installed Android Developer Tools (ADT), Java Development Kit (JDK) and Java Runtime Environment (JRE). After that, make sure that you are able to run adb commands from your command prompt. Then make sure that you have connected your phone to your PC as a Camera (PTP) device giving it access to USB debugging.
How To Record using ADB Command Line
Commands are run from cmd.exe in Windows. Other OS users can use shell or terminal to run these commands. Basically, you will have to get to the command prompt and run these commands.
adb shell screenrecord /sdcard/videorecord.mp4
This command records your screen activity for three minutes, which is the default duration. If you want to stop recording, hit CTRL+C to stop the command as well as the recording.
You can also customize different things like duration, quality, resolution etc. of the video.
Options for adb shell screenrecord
— size
Set the width and height of the recorded video.
Example:
adb shell screenrecord –size 1280×720 /sdcard/videorecord.mp4
Result: Records a HD 720p video. Make sure that your device supports it.
–bit-rate
Set the video bit rate in megabits per second. If you do not set it, the video is recorded at 4 megabits per second. You can change the rate to alter the quality as well as the final size of the recorded video.
Example:
adb shell screenrecord –bit-rate 2000000 /sdcard/videorecord.mp4
Result: Records at 2 megabits per second. Default bit rate: 4 megabits per second.
–time-limit
Set the length of time in seconds for the recording to happen. You can always press CTRL+C to stop in the middle. This is like setting the maximum time.
Example:
adb shell screenrecord –time-limit 120 /sdcard/videorecord.mp4
Result: Records a video for 2 minutes (120 seconds). The default as well as maximum time limit is 3 minutes.
You can combine options as
Example:
adb shell screenrecord –bit-rate 2000000 –size 1280×720 –time 120 /sdcard/videorecord.mp4
Records a video for 2 minutes, with a bit rate of 2 Mbps and a resolution of 720p in your sdcard giving it a filename videorecord.mp4.


