One of the juiciest features of Android Marshmallow or Android 6.0+ is managing permissions for individual apps on a granular basis. That means you can authorize one app to use certain pre-approved permissions even though it requests wider access in your device. You can truly control what an app can access and keep certain apps from getting certain data like your location or contacts.
The possibility to control app permissions means that you have the upper hand, and can make sure that your data stays safe with you and snoopers cannot get a free pass into your digital life. This is a great new thought-out feature when privacy and other issues keep popping up on the internet. At least now, you can do all that it takes to block app permissions until and unless those are necessary to perform a certain task that you cannot live without.
Giving Permissions When Asked
When using an app, if it doesn’t have the authorization to use a certain feature like say Camera and it needs to take pictures, then a dialog will open that asks you to give it the access to the requested feature—in this case Camera. You can accept or deny the request.

If you deny it, then it won’t be able to perform the said function like taking pictures. Only a dark screen will be displayed. In most cases, you will want to pass the request but it prevents suspicious requests from going through in the background. Like I said before—you have the upper hand.
Application Wise Permissions
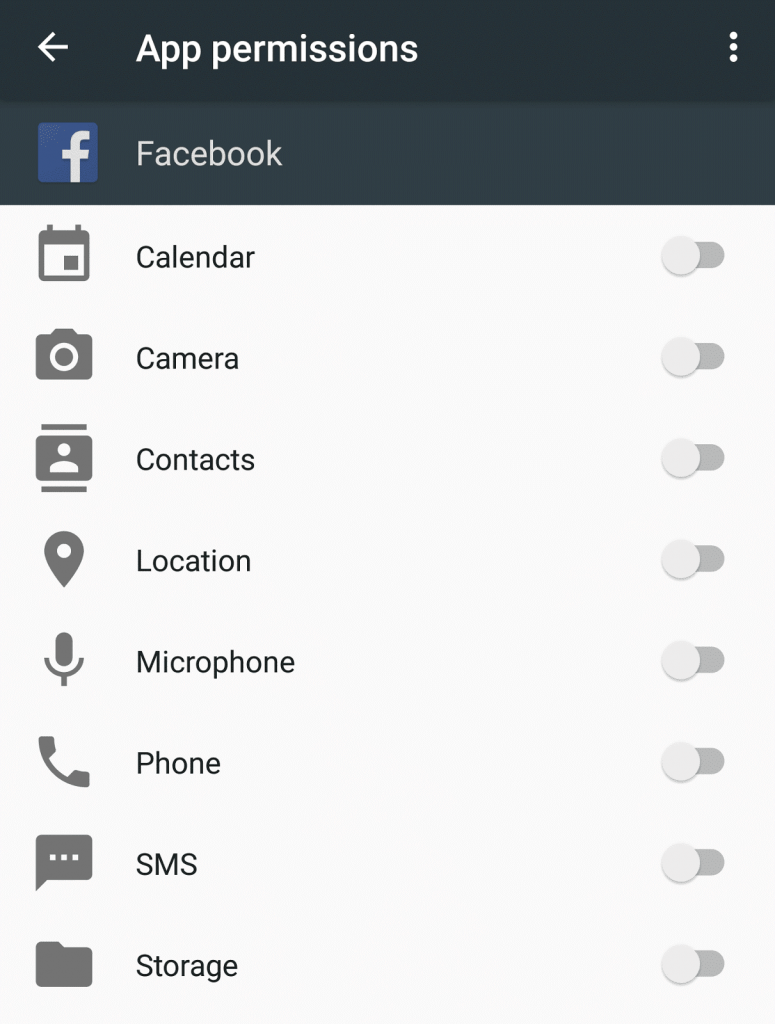 In regards to application-wise permission authorizations, the basic controls are available in the Settings and App management area. When you tap on the individual app to manage it, you can visit its dedicated permission page to see all the requested permissions.
By default, newly installed applications aren’t given any special authorizations. They just are given the basic or common ones like Wi-Fi, internet access, notifications etc. Only if you upgraded from your previous Android version i.e. Lollipop to Marshmallow, those permissions that you already granted stick around. You can obviously turn them off.
The Steps
Here are the steps in detail for application permission management in Android Marshmallow:
To View, Grant or Revoke Access Authorizations
- Go to your phone’s main Settings.
- Scroll down to Devices and tap on the option that says Apps.
- From the list, tap on a downloaded app for which you want to manage the permissions. For example: Facebook.
- Tap on Permissions.
You will get the list of permissions that your app is asking for. If it is a new app then it won’t have any of the listed permission. If it is an app before the Marshmallow upgrade, then it is a totally different case.
- For new apps: You can give the permission now or give them later when they are asked for specifically.
- For old apps: You can try to revoke permissions but it will warn you saying that the app might stop working
Viewing Additional App Permission Details
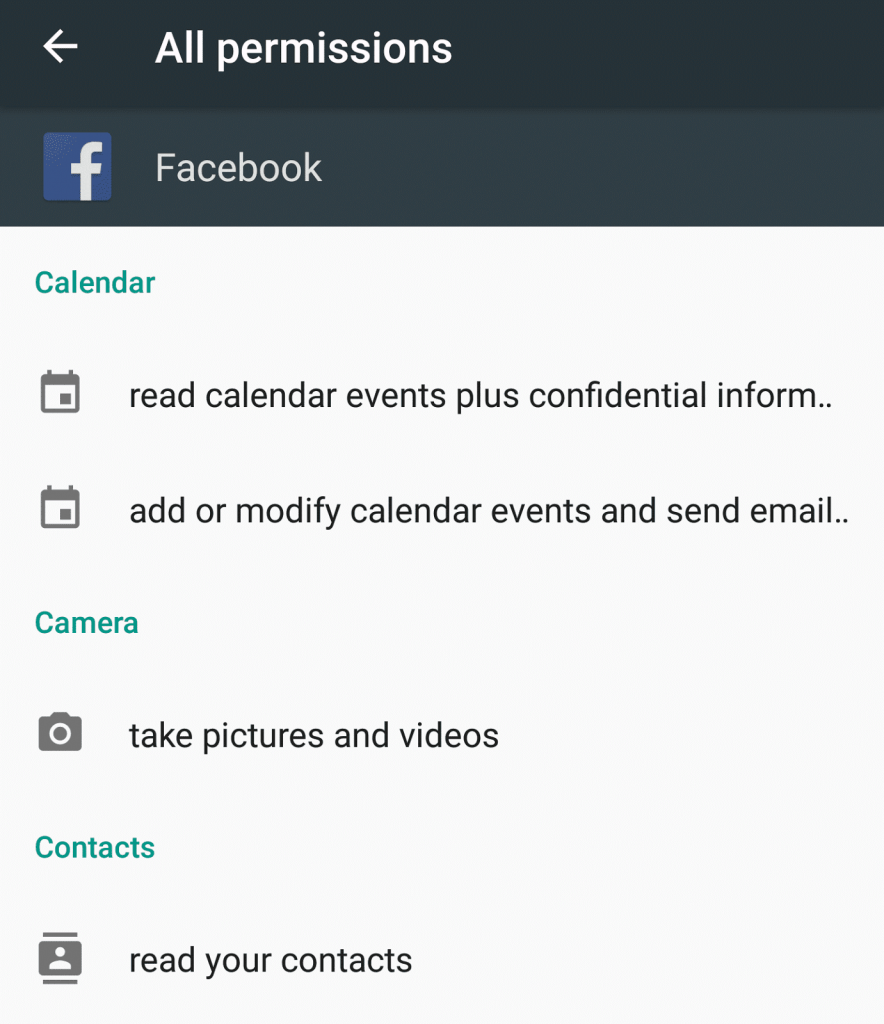
In the same screen (Settings > Devices – Apps > Permissions > [Your app]), you can tap on the options menu and then on All Permissions to get additional details. You will get an explanation; like for camera it says, “Take pictures and videos.” Tap on it and get more details. It is the answers to the “WHY?”
Permission Wise Applications
Viewing All App’s Permissions at a Glance
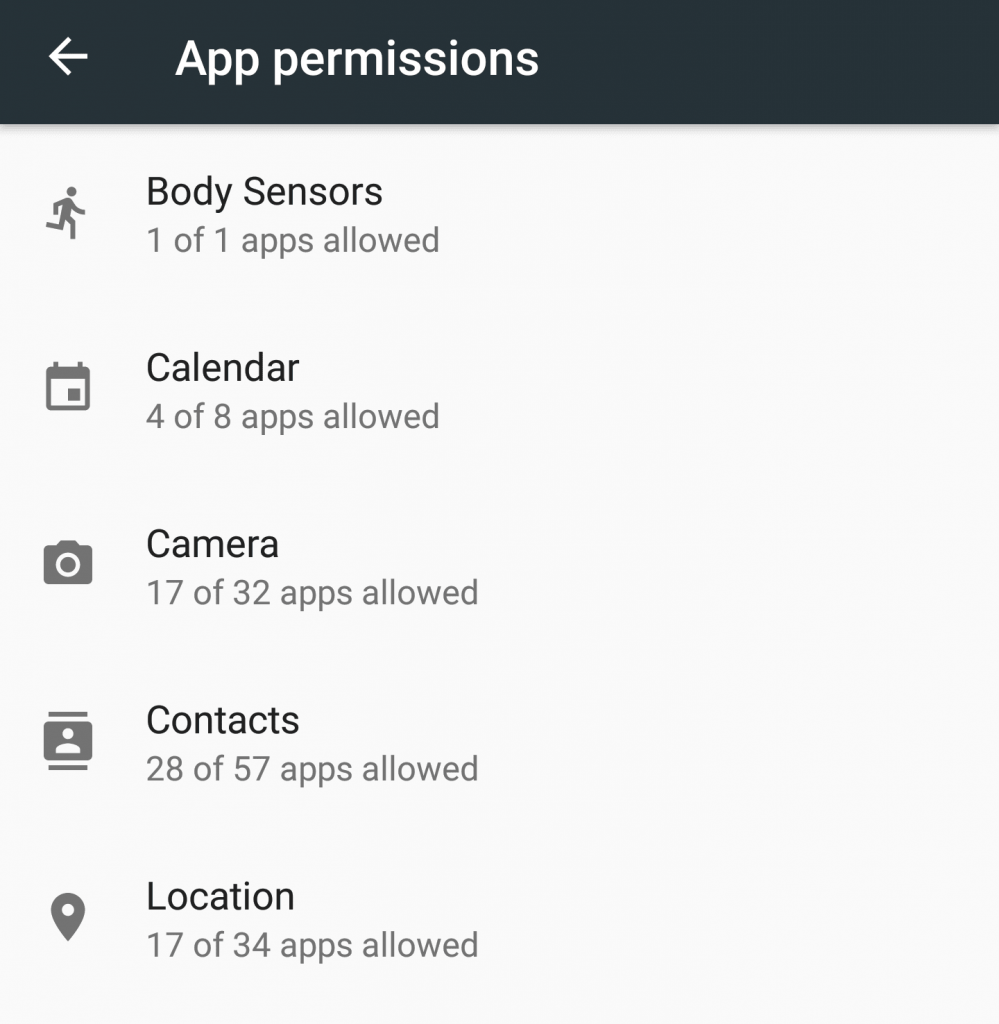 Instead of the app by app permission management, you can access the same feature on a permission by permission basis. This is sort of reversed than what was discussed above. You can access the summary of all the permissions and the number of applications that are authorized. With individual permissions, you can view the applications that have the access to it and you can either revoke or approve them.
For example: You can check out Camera permissions and get a list of all the apps under it. You can then scroll through the list and add or remove the consent.
The Steps
- Go to your phone’s Settings.
- Under Device, tap on Apps.
- Click the gear icon seen on the top right part of the screen.
You will reach Configure apps. - Tap on App permissions.
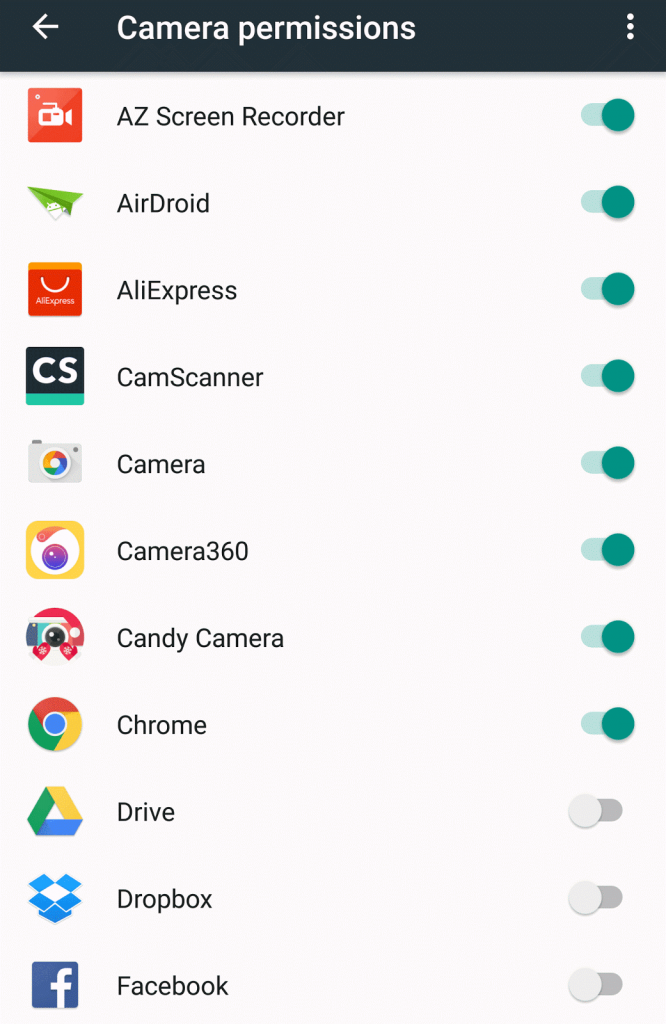 Now you will see a list of all the permissions like Body Sensors, Calendar and Camera. You will also see a summary like 15 of 30 apps allowed under each item. Tap on an item and you will see all the applications listed under it.
You can tap and move their individual sliders to add or revoke access. The list initially displays only downloaded applications. You can also click on the options menu to see system applications.
Advanced Permissions
In the same Configure Apps screen (Settings > Device – Apps > [Gear Icon]) you can see the Advanced heading. Under it are more related options.
- Draw over other apps: It allows an app to display on top of other apps. Like screen recording apps for Android require it to do their thing.
- Modify system settings: Giving the app the approval to modify system settings.
Final Words
It is truly welcoming to know that we can finally control a lot more than what we could in previous versions of Android. If you care about your privacy, then take a look with the help of the steps above and you can certainly protect a lot of your private data. It should also be noted that with each manufacturer implementing their unique features, and more and more devices getting Android Marshmallow, we will certainly see different implication of this app permission control feature.

